Table of Contents
Table of Contents
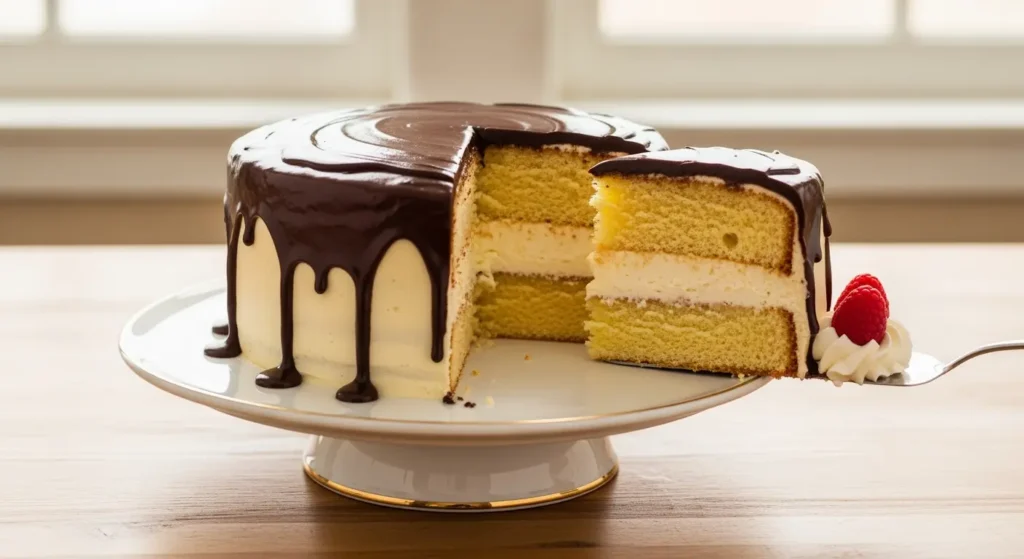
So, this Boston cream cake recipe has been my go-to showstopper for literally decades now. And let me tell you why – picture the fluffiest yellow cake you’ve ever had, stuffed with this dreamy vanilla cream that’s basically heaven in a bowl, then topped with chocolate frosting so good it should probably be illegal. I’m not even exaggerating here!
You know what I love most about this homemade cake? It looks like you spent hours being all fancy in the kitchen, but honestly? It’s way easier than people think. The cake’s super moist, the filling is ridiculously creamy, and that chocolate topping? Chef’s kiss
Whether you’re trying to impress your in-laws, need something amazing for a potluck, or just want to treat yourself (no judgment here!), this Boston Cream Cake Recipe never lets me down. Plus, you can make most of it ahead of time, which is perfect when you’re hosting and don’t want to be stuck in the kitchen all day.
Why You’re Gonna Be Obsessed with This (Boston Cream Cake Recipe)
Okay, I’ve made this cake more times than I can count, and it works EVERY. SINGLE. TIME. Here’s why this version is absolutely perfect:
It’s Basically Foolproof: The vanilla filling uses instant pudding mix and Cool Whip (yeah, I said it!). My grandma taught me this trick, and honestly? It’s genius. No fussy pastry cream that might curdle or split – just mix it up and boom, you’re done.
The Chocolate Frosting is Everything: I make this from scratch because store-bought just doesn’t compare. It spreads like butter and tastes like you melted down the best chocolate bar ever. Trust me on this one.
I’ve Done All the Testing for You: I’ve messed this up enough times to know exactly what works and what doesn’t. No surprises, no kitchen disasters – just pure dessert magic.
Perfect for Any Occasion: Birthday party? Check. Sunday dinner? Absolutely. Tuesday because you deserve cake? You bet!
What Even IS Boston Cream Cake Recipe Anyway?
Boston Cream Cake Recipe(or Boston Cream Pie – yeah, it’s confusing) is basically layers of soft yellow cake with vanilla cream filling and chocolate on top. That’s it, and it’s perfect.
The whole “pie vs. cake” thing? Don’t even get me started. It’s definitely a cake, but some genius back in the 1800s decided to call it a pie because they baked it in pie pans. The name just stuck, and now we’re all confused forever.
Fun fact: This beauty was invented at a fancy Boston hotel in 1856, and it’s actually Massachusetts’ official state dessert. The recipe hasn’t changed much since then, which tells you everything you need to know about how good it is.
What You’ll Need (Ingredients)

For the Cake Part
- Yellow cake mix (1 box) – Look, you can make it from scratch if you want to be fancy, but life’s short
- 3 eggs
- 1 cup water
- 1/2 cup vegetable oil
If you’re feeling ambitious: 2¼ cups flour, 1½ cups sugar, 3 eggs, 1 cup milk, ½ cup melted butter, 2½ tsp baking powder, 2 tsp vanilla. But honestly? The box mix is totally fine.
For the Cream Filling (The Star of the Show)
- Instant vanilla pudding mix (5.1 oz box)
- 2½ cups cold milk
- Cool Whip (8 oz, thawed)
Want to go full homemade? You’ll need milk, egg yolks, sugar, cornstarch, vanilla, and butter. But seriously, my way is easier and tastes just as good.
For the Chocolate Topping
- 5⅓ cups powdered sugar (I know it seems like a lot!)
- ½ cup cocoa powder
- ½ cup melted butter
- ½ cup milk
- 1 tsp vanilla
You’ll Also Need: A 9×13 pan, electric mixer, and maybe a good knife for cutting layers (or get fancy with a cake leveler if you have one).
Step By Step (Boston Cream Cake Recipe)!
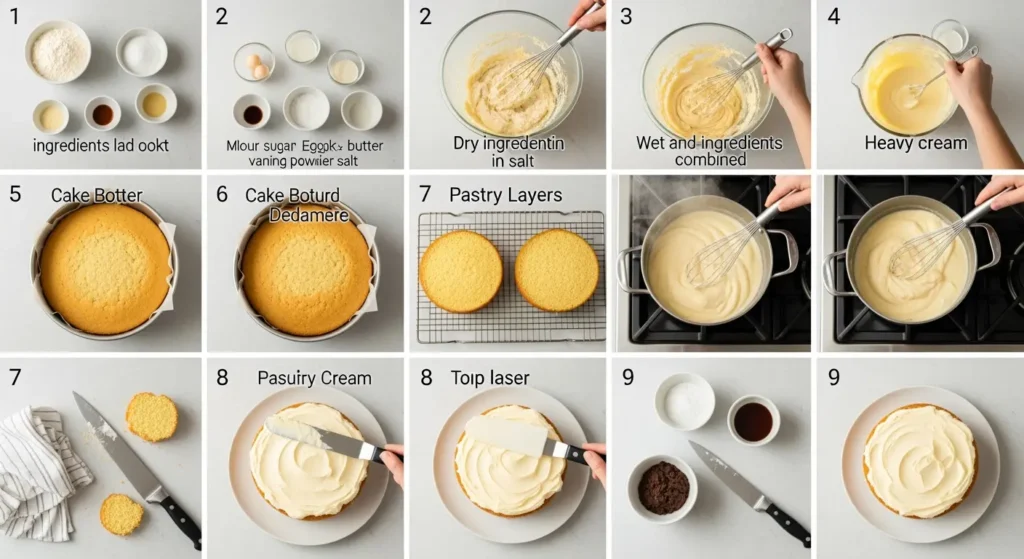
Step 1: Cake Time
Preheat your oven to 325°F – a bit lower than usual, which keeps the cake from getting all puffy and weird on top.
Throw your cake mix, eggs, water, and oil into a big bowl and beat it with your mixer for about 2 minutes. Don’t go crazy here – overmixing makes tough cake, and nobody wants that.
Grease your pan really well (trust me, nothing’s worse than stuck cake), pour in the batter, and give the pan a little tap to get rid of air bubbles. Bake for 23-28 minutes until a toothpick comes out mostly clean.
Here’s the hard part: LET IT COOL COMPLETELY. I know you want to dive right in, but warm cake + cream filling = disaster. Go watch Netflix or something.
Step 2: The Magic Filling
While you’re waiting, make the filling. Whisk that pudding mix with cold milk for about 2 minutes until it gets thick enough to coat a spoon.
Now fold in your Cool Whip – be gentle here, you don’t want to deflate all that fluffiness. Once it’s smooth and gorgeous, cover it and stick it in the fridge for at least 30 minutes.
Step 3: Chocolate Heaven
Mix your powdered sugar and cocoa (sift it if you’re feeling fancy, but I usually just whisk really well). Make a little well in the middle and add your melted butter, milk, and vanilla.
Start mixing on low so you don’t create a sugar tornado in your kitchen, then beat it until it’s smooth and spreadable. Too thick? Add more milk. Too thin? More powdered sugar. You’ve got this!
Step 4: Assembly Time (The Fun Part!)
Once your cake is completely cool, flip it out onto some parchment paper and cut it in half horizontally. I use a long knife and just go slow – don’t stress if it’s not perfect.
Put the bottom layer back in your pan (makes everything easier), then spread that gorgeous filling all over it. Leave a little border because it’ll squish out when you add the top layer.
Carefully plop the second layer on top, then dollop that chocolate frosting right in the center and spread it out. Work quickly but don’t panic – you’ve got this!
Step 5: The Waiting Game
Cover it up (don’t let the plastic touch the frosting) and refrigerate for at least 3 hours. I know, I know – more waiting. But this is when all the flavors get to know each other and the whole thing sets up properly.
Take it out about 30 minutes before serving so the frosting softens up a bit. Trust me on the timing here.
My Best Tips (Learn from My Mistakes!)
Seriously, Cool the Cake: I cannot stress this enough. Warm cake = melted filling = sad times. Just don’t do it.
Don’t Overmix Anything: Cake batter, filling, frosting – once it’s combined, stop. Your arm will thank you, and so will your taste buds.
Get the Frosting Right: It should spread easily but not run off. When in doubt, make it a bit thicker – you can always add more milk.
Patience is Key: The chilling time isn’t optional. It’s when this cake goes from good to absolutely incredible.
Fun Variations to Try
Poke Cake Version
Want to make this even easier? Make it a poke cake! Bake the yellow cake, poke holes all over with a wooden spoon handle, then pour thin pudding over the warm cake. Top with chocolate ganache. Super moist and zero layering required.
Graham Cracker Version
No baking required! Layer graham crackers with custard and chocolate ganache. Soak the crackers in a bit of milk first so they soften up. It’s like a completely different dessert but still totally Boston cream vibes.
Keto-Friendly Option
Swap out regular flour for almond flour, use sugar-free pudding mix, and replace sugar with erythritol. It takes some experimenting, but it can totally work if you’re watching carbs.
Questions Everyone Asks About (Boston Cream Cake Recipe)
Can I make this ahead?
Absolutely! Actually, it’s better the next day when everything’s had time to chill together. Perfect for party planning.
Can I use different cake flavors?
Stick with yellow or vanilla – chocolate cake would be overkill with the chocolate frosting. Though if you’re feeling rebellious, go for it!
Why is it called pie when it’s obviously cake?
Because people in the 1800s were apparently as confused as we are! They baked it in pie pans, so “pie” it became. We’re stuck with it now.
How do I make the chocolate super shiny?
Make a ganache instead! Heat cream, pour over chocolate, add a bit of corn syrup. So glossy you can see your reflection.
Let’s Be Friends!
Did this Boston Cream Cake Recipe make you the hero of your kitchen? I want to hear all about it! Drop a comment and give it some stars – it seriously makes my day and helps other people find this recipe.
Now go make this cake and prepare for everyone to ask you for the recipe. You’re welcome! 🎂
Reviews
There are no reviews yet. Be the first one to write one.