Table of Contents
Okay, real talk—are you tired of those cheesecake recipes that make you feel like you need a PhD in baking? You know the ones. They’re all “create a perfect water bath” and “pray your cheesecake doesn’t crack like the Grand Canyon.” Yeah, I’m over it too. That’s why this no bake blueberry cheesecake recipe is about to become your new best friend.
Here’s the deal with this blueberry cheesecake recipe: it’s ridiculously creamy (like, melt-in-your-mouth good), insanely easy to make, and looks like you spent all day at some fancy bakery. But between you and me? It takes maybe 30 minutes of actual work, and then your fridge does the rest. No oven drama, no special equipment, and definitely no cracking. Just pure, blueberry-swirled perfection.
I’ve made this thing about a million times (okay, maybe not a million, but a lot), and I’ve worked out all the kinks so you don’t have to. Trust me, if you can use a mixer and follow a few simple steps, you’ve got this. Let’s make something amazing together!
Why This is the Best Blueberry Cheesecake Recipe
Look, I’m not usually one to brag, but this recipe is kind of amazing. Here’s why you’re gonna love it:
- No Oven, No Cracks: Seriously, we’re skipping the oven entirely. No more watching through the oven door like a nervous parent, wondering if your cheesecake is gonna crack. This one sets in the fridge, which means perfect results every. single. time.
- Crazy Creamy Texture: The secret? We’re whipping heavy cream and folding it into cream cheese—no weird gelatin needed. The result is this light, mousse-like texture that’s basically what clouds would taste like if clouds were made of dessert.
- Super Flexible: Got fresh blueberries? Great! Only have frozen? Also great! Want to switch up the crust? Go for it! This recipe doesn’t judge.
- Perfect for Literally Any Time: Making this for a summer BBQ? Awesome. Holiday dinner? You bet. Random Tuesday because you deserve something nice? Absolutely. Plus, you can make it the night before, so there’s zero stress when people show up.
Ingredient Spotlight & Substitutions
Alright, let’s talk about what you need. Don’t worry—it’s all pretty basic stuff, and I’ll give you some swap-out options too.
For the Graham Cracker Crust
- Graham Crackers (about 1½ cups when crushed): The classic choice, and honestly, you can’t go wrong here.
- Melted Butter (5-6 tablespoons): This is what holds everything together and makes it taste amazing.
- Sugar (2-3 tablespoons): A little sweetness goes a long way.
Swap It Up: Vanilla wafers make things a bit sweeter, or you could use those British digestive biscuits if you’re feeling fancy. Going gluten-free? Just grab gluten-free graham crackers—they work perfectly.
For the Cream Cheese Filling
- Full-Fat Block Cream Cheese (16 ounces): This is important, folks. Get the full-fat stuff in the block, not the tub. The spreadable kind has weird additives that’ll mess with your texture. Trust me on this one.
- Heavy Whipping Cream (1 cup): This is what makes everything light and fluffy.
- Sour Cream (½ cup): Adds this nice tangy flavor that keeps things from being too sweet.
- Powdered Sugar (¾ cup): Way better than regular sugar here because it dissolves super easily.
- Fresh Lemon Juice (1-2 tablespoons): Brightens everything up—don’t skip it!
- Vanilla Extract (1-2 teaspoons): Because vanilla makes everything better.
Want to Lighten Things Up?: You can use Neufchâtel cheese (that’s the ⅓ less fat cream cheese) instead of regular cream cheese. It’ll still be delicious, just slightly less rich.
For the Homemade Blueberry Topping
- Blueberries (2 cups, fresh or frozen): Fun fact—frozen berries actually make a more vibrant sauce because they release more juice. So if you’ve only got frozen, you’re actually winning.
- Sugar (⅓ cup): To sweeten things up.
- Lemon Juice (1 tablespoon): Again with the lemon—it just makes the blueberry flavor pop.
- Cornstarch (1 tablespoon): This thickens everything up so you get those pretty swirls.
Essential Equipment
You don’t need a fancy kitchen for this, but here are the basics:
- 9-inch Springform Pan: This is the one thing you really need. The sides pop off, which means you can get your blueberry swirl cheesecake out without destroying it. Worth the investment!
- Electric Mixer: Hand mixer or stand mixer—either works. You just need something to get that cream cheese smooth.
- Food Processor: Makes crushing graham crackers super easy. Don’t have one? Put them in a ziplock bag and go to town with a rolling pin. Very therapeutic.
- Mixing Bowls: Grab a couple—one for the filling, one for whipping cream.
- Rubber Spatula: For gentle folding (we’ll get to that).
- Small Saucepan: For cooking up that gorgeous blueberry sauce.
Step-by-Step Instructions
Okay, let’s do this! It’s way easier than you think.
Step 1: Make the Blueberry Sauce
Toss your blueberries, sugar, lemon juice, and cornstarch into a small pot over medium heat. Stir it around as it heats up—you’ll see the berries start popping and turning everything purple (so satisfying!). Let it simmer for about 5-7 minutes until it gets thick and glossy. Then take it off the heat and let it cool down completely. Pro tip: you can make this a day ahead if you want to spread out the work.
Step 2: Prepare the No-Bake Crust
Throw your graham crackers in the food processor and pulse until they’re all crushed up—you want about 1½ cups of crumbs. Mix those with your melted butter and sugar until it looks like wet sand. Press this mixture firmly into the bottom of your springform pan (I use the bottom of a measuring cup to really pack it down). Stick it in the fridge for at least 15-30 minutes while you make the filling.
Step 3: Create the Creamy Filling
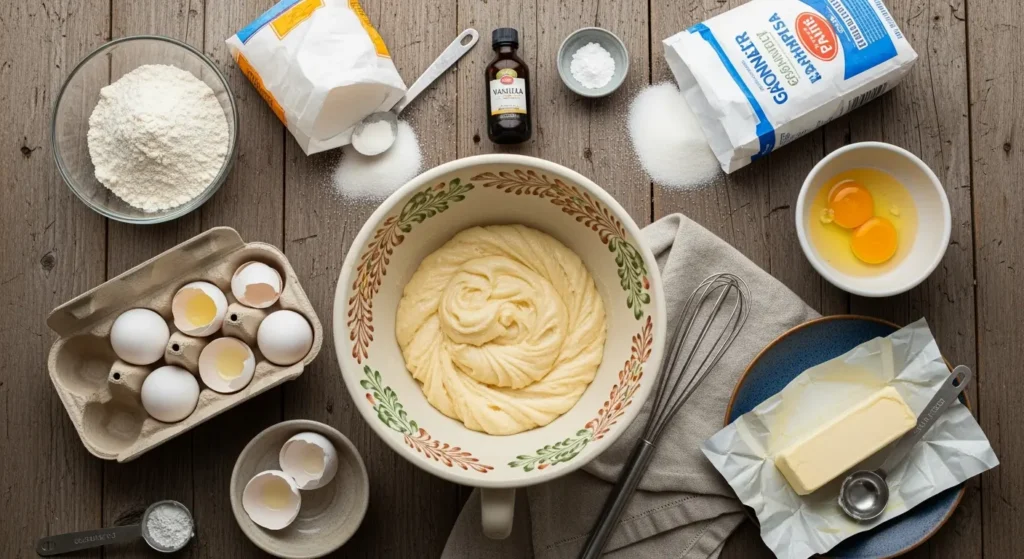
Here’s where the magic happens. Beat your room-temperature cream cheese (seriously, don’t skip the room temp part!) with the powdered sugar for a solid 2-3 minutes. You want it completely smooth—no lumps allowed. Then mix in your sour cream, lemon juice, and vanilla.
In a separate bowl, whip your heavy cream until it forms stiff peaks. This usually takes 3-4 minutes on high speed. You’ll know it’s ready when you can lift the beaters and the cream holds its shape.
Now here’s the crucial part: gently fold the whipped cream into your cream cheese mixture. Use a spatula and do this folding motion—like you’re hugging the mixture together. Don’t just stir it or you’ll deflate all that air we just whipped in. Do this in three batches, and you’ll end up with this dreamy, fluffy filling.
Step 4: Assemble and Swirl
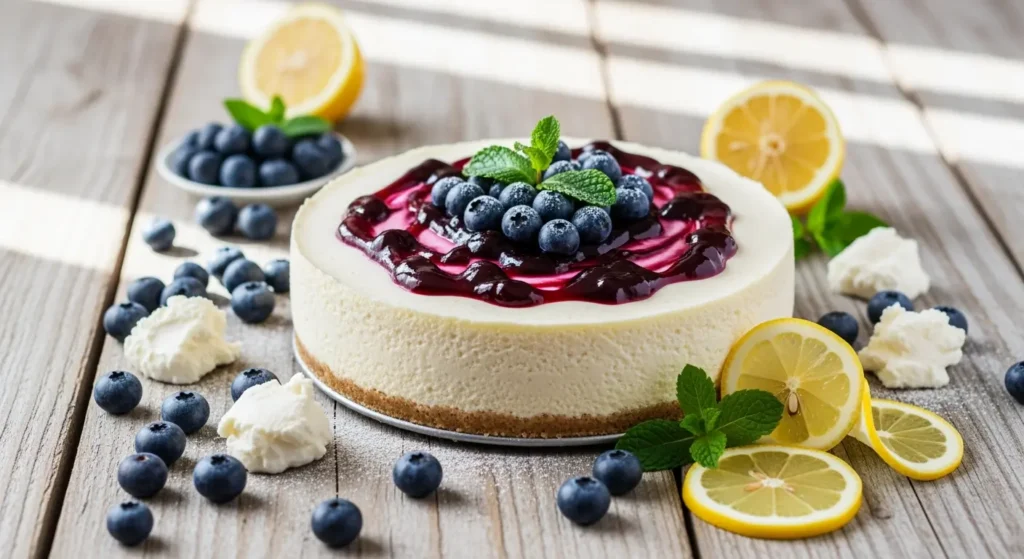
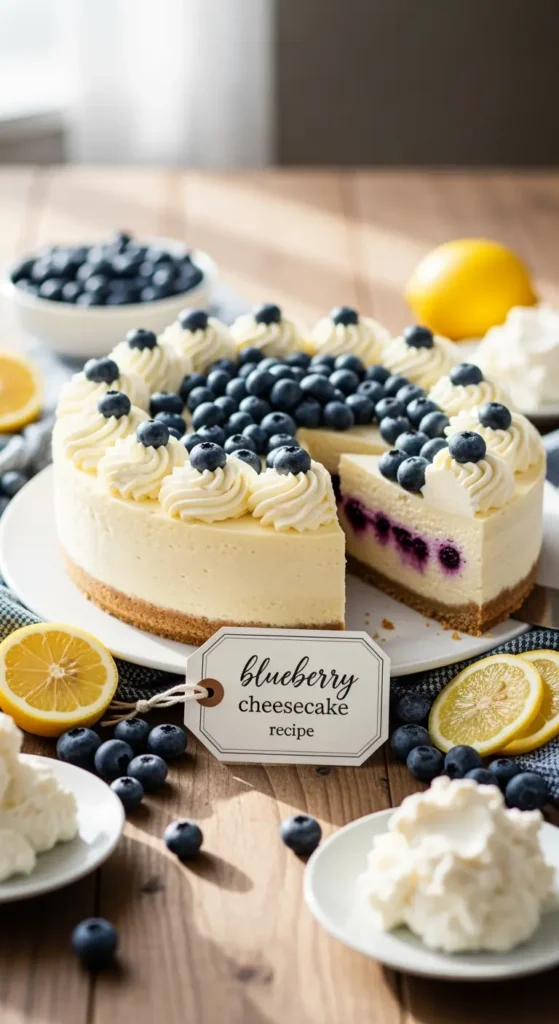
Spread half your filling over that chilled crust. Now drop spoonfuls of your cooled blueberry sauce all over the top. Take a knife or skewer and gently swirl it around in a figure-eight pattern. Don’t overdo it—you want pretty purple ribbons, not a purple blob. Add the rest of your filling, smooth it out, and do the swirling thing again on top. This is the fun part where you get to be artsy!
Step 5: Chill to Perfection
Cover your masterpiece with plastic wrap (careful not to touch the top) and stick it in the fridge for at least 6 hours. Overnight is even better. I know it’s hard to wait, but this is what transforms everything from soupy to perfectly sliceable. Patience, my friend!
Expert Tips for the Perfect Cheesecake
Want to nail this on the first try? Here are my secrets:
- Room Temperature Cream Cheese is Non-Negotiable: Take it out of the fridge at least 2 hours before you start. Cold cream cheese = lumpy filling, and nobody wants that. If you’re in a hurry, you can microwave it for like 10 seconds (carefully!), but room temp is way better.
- Don’t Go Crazy Mixing After You Add the Whipped Cream: Once that whipped cream goes in, be gentle. You’re folding, not mixing. Overmixing deflates everything and you’ll end up with a dense cheesecake instead of a light, fluffy one.
- Want Perfect Instagram-Worthy Slices?: Here’s the trick: dip your knife in hot water, wipe it clean, then cut. Do this before every single slice. Yeah, it’s a little extra, but your slices will look like they came from a professional bakery.
- This Gets Better With Age: Make this a day or two ahead. The flavors get even better, and it’s way less stressful when you’re not rushing around the day of your party.
- Keep That Crust Crispy: Make absolutely sure your blueberry sauce is completely cool before you start swirling. Hot sauce = soggy crust, and that’s a bummer.
Recipe Variations to Try
Once you’ve made this a few times (and you will), here are some fun twists:
Baked Blueberry Cheesecake Recipe
Miss that traditional baked texture? Add 3 eggs to your cream cheese mixture (skip the whipped cream part) and bake it in a water bath at 325°F for about an hour. It’s a little more work, but some people really love that dense, classic texture.
Gluten-Free Version
Just swap in gluten-free graham crackers for the crust. There are some really good brands out there now that taste almost identical to regular ones. Or you could use ground almonds with butter and sugar for a naturally gluten-free crust that’s also super tasty.
Vegan/Dairy-Free Option
Okay, this takes a bit more effort, but it’s totally doable! Use soaked cashews blended until super smooth for your “cream cheese,” coconut cream (the thick stuff from a can) for your whipped cream, and maple syrup instead of sugar. The blueberry topping is already vegan, so you’re good there. And honestly? It’s delicious.
Serving and Storing Your Cheesecake
Let’s talk about getting this beauty to the table and keeping leftovers (if there are any!).
Serving
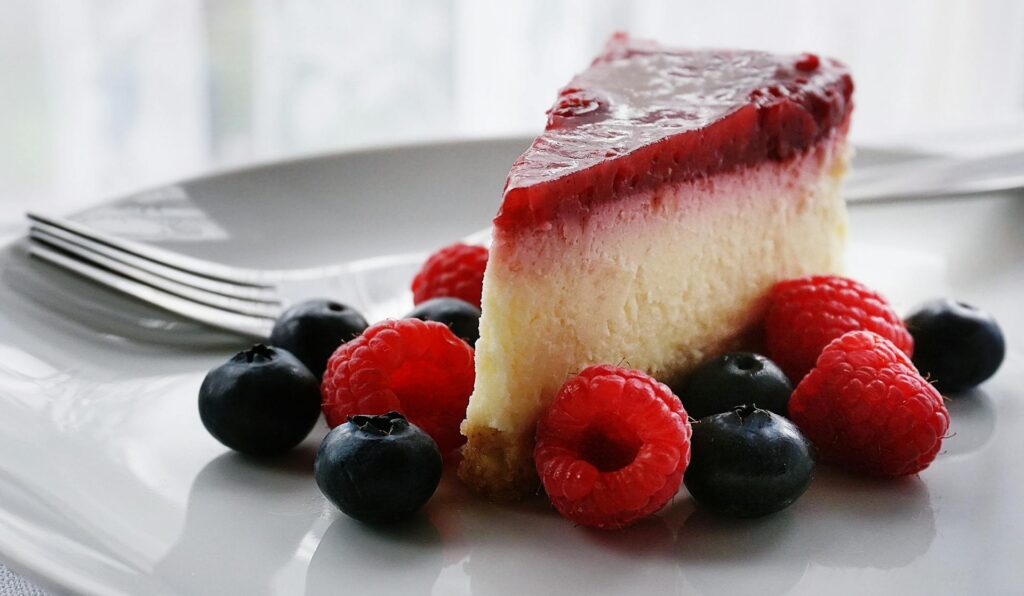
Pull your cheesecake out of the fridge about 10 minutes before serving—it tastes better when it’s not ice-cold. Pop open that springform pan and slide it onto a pretty plate. Drizzle some of that leftover blueberry sauce over each slice, toss on some fresh berries, maybe a little whipped cream if you’re feeling fancy. A tiny sprinkle of lemon zest or a mint leaf makes it look super professional.
Storing
Cover it up and keep it in the fridge for up to 5 days. Honestly, it gets even better after day 2 when all the flavors have had time to hang out together.
Freezing
Yep, you can freeze this! Wrap it really well in plastic wrap and then foil, and it’ll keep for up to 3 months. Just thaw it in the fridge overnight when you’re ready to eat it. The texture stays surprisingly creamy—I’ve been shocked by how well it freezes.
Frequently Asked Questions (FAQ)
Can I use frozen blueberries for the sauce?
Absolutely! In fact, frozen berries often make a more intensely colored sauce because they release more juice. Just toss them in frozen—no need to thaw. You might need to cook them an extra minute or two, but that’s it.
Help! My no-bake cheesecake isn’t setting!
Usually this means one of two things: either your cream wasn’t whipped enough (it really needs to be at stiff peaks), or you didn’t give it enough chill time. Six hours minimum, friends—overnight is way better. Also, if your cream cheese was still cold when you mixed everything, that can mess with the texture too.
Can I make this in a regular pie dish instead of a springform pan?
You can, but fair warning—getting slices out is gonna be messy. If you go this route, think of it more like serving scoops. Or just accept that the first slice is a sacrifice to the dessert gods and the rest will come out easier.
What are the health benefits of blueberries?
Okay, so blueberries are actually pretty amazing for you! They’re loaded with antioxidants (those are the good guys that fight off bad stuff in your body), they’re great for your brain, might help with memory, and they’re good for your heart too. Plus they’ve got vitamin C and fiber, and they’re relatively low in calories. So basically, eating this cheesecake is basically a health food, right? (I’m kidding, but the blueberries are legit good for you!)
Conclusion: Time to Get Your Cheesecake On!
So there you have it—your foolproof guide to making the most amazing no bake blueberry cheesecake that’ll have everyone asking for the recipe (and honestly, you should probably just send them this link because I’ve covered everything!).
Here’s the thing I love most about this recipe: it’s forgiving. Maybe you over-swirled the blueberries a bit, or your slices aren’t perfectly Instagram-worthy—it’s still gonna taste absolutely incredible. That’s the beauty of a no-bake cheesecake. It’s hard to mess up, but it’s easy to make it look and taste like you’re a professional pastry chef.
Whether you’re making this for a crowd or just because you want something delicious waiting for you in the fridge (no judgment here!), this blueberry cheesecake recipe delivers every single time. Plus, once you’ve nailed the basic version, you can start playing around with all those variations I mentioned. Mini blueberry cheesecake cups for parties? Yes, please! Blueberry swirl cheesecake with a different crust? Go wild!
Reviews
There are no reviews yet. Be the first one to write one.